
 Cheese calculator


 Winemaking


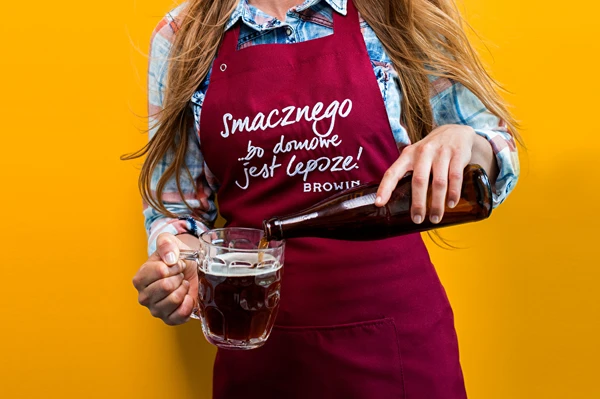
Wine is a beverage known since the dawn of time; even the ancients enjoyed it, and successive generations perfected the art of making and tasting it. Today, wine accompanies both ceremonial occasions and family dinners, as well as everyday meals and gatherings. A glass of good wine makes conversations and relaxation more pleasant, lifts the mood, and stimulates the senses… When consumed in moderation, it can have a beneficial effect on our health — it improves digestion, has a positive effect on the circulatory system, has anti-cancer properties, and prolongs youth. You can successfully create this precious drink at home. All you need are good raw materials and a handful of the information below. Such wine, apart from its flavor qualities, also gives a great sense of satisfaction — enthusiasts of home winemaking, whose numbers are constantly growing, know this best. It’s worth a try. There’s a good chance it will become your favorite hobby.

Basic knowledge and recipes for homemade wines
Before you embark on your home winemaking adventure, it’s worth learning a bit about the processes of fermentation and wine maturation. It’s also a good idea to use proven recipes. You’ll find all the valuable information in professional literature. We recommend both a short guide and a more extensive book which, in addition to basic and more specialized knowledge, also includes tried-and-tested recipes for delicious wines. For those using the Internet, we offer a great, quick, and easy-to-use tool available on our website wine calculator. You plan, it calculates. Thanks to this solution you’ll learn what quantities of ingredients to use so that fermentation runs optimally and the wine tastes its best. You’ll also find out how much fruit to use to obtain the planned amount of finished drink. A new convenience for customers is the mobile app Homemade Wine, which has all the functions of the aforementioned calculator; in addition, it lets you save your own wine recipes and makes it easy to track the fermentation process. Once you have a plan for which raw material and in what quantity you want to turn into wine, you can move on to the next stages.
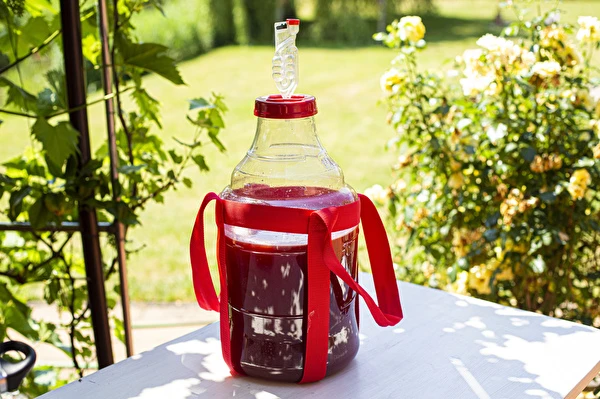
What to ferment in?
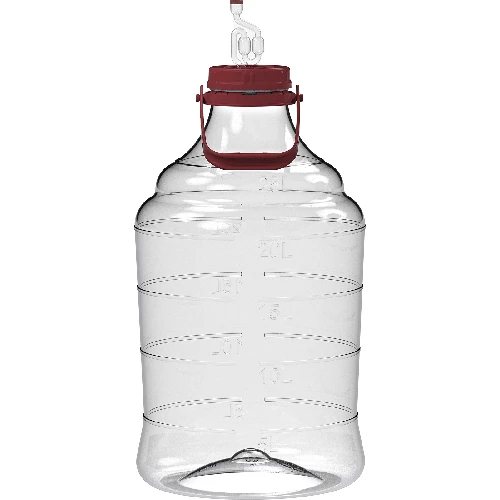
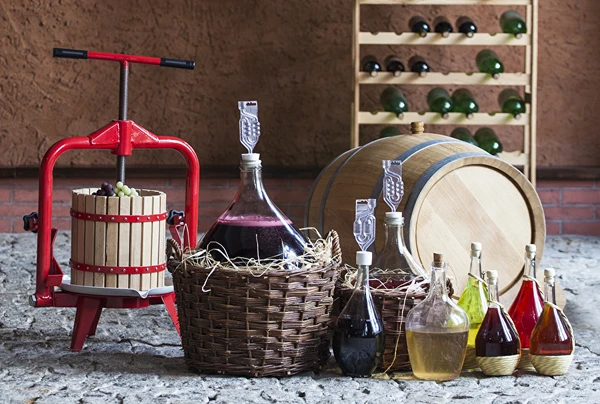
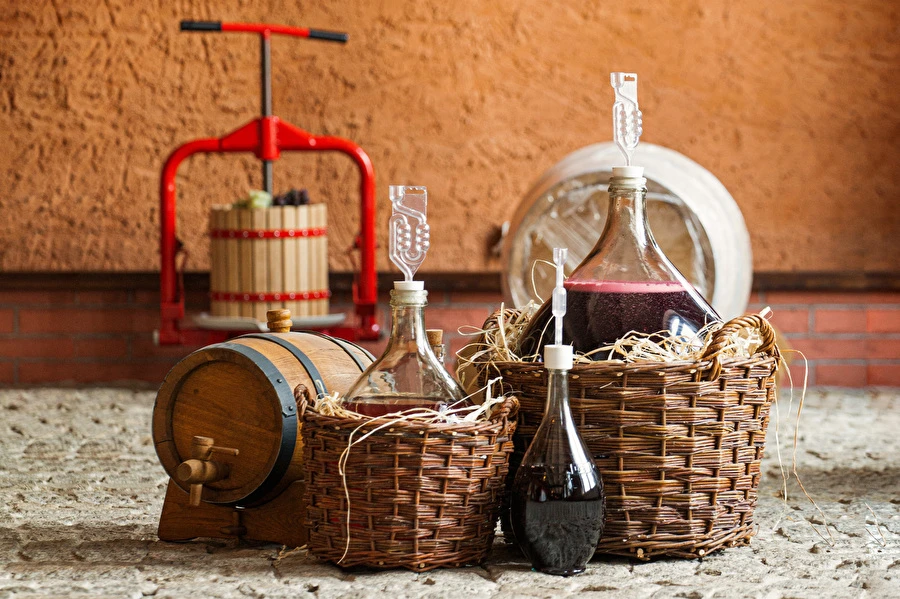
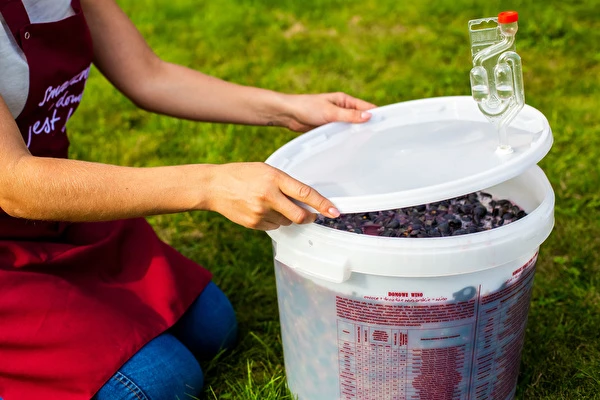
The fermentation process can be carried out in classic glass vessels: demijohn, glass demijohn, as well as a shatterproof demijohn, or a fermentation container. A great solution for smaller batches of wine are fermentation jars. No matter what you make your wine in, the rule is the same — the vessel must be equipped with an airlock that vents the carbon dioxide produced during the process and protects the liquid from fruit flies and other intruders from outside.
Cleaning the equipment
Remember that the winemaking equipment you will use should be perfectly clean and sanitized. This will prevent infections that could spoil the wine. Use a regular detergent for washing; to sanitize winemaking equipment, use a solution of potassium metabisulfite or Oxi Turbo - sodium percarbonate. Do not wash carboys and other fermentation accessories with hot water. Excessive temperature can cause cracks or deformation.
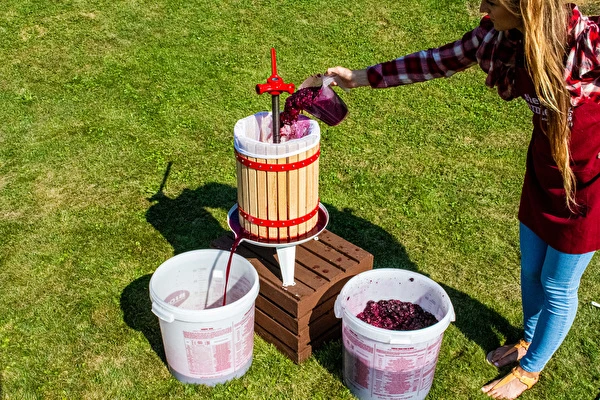
Preparing the fruit must
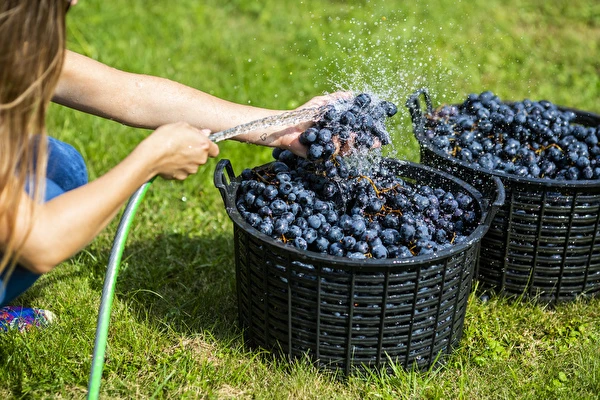
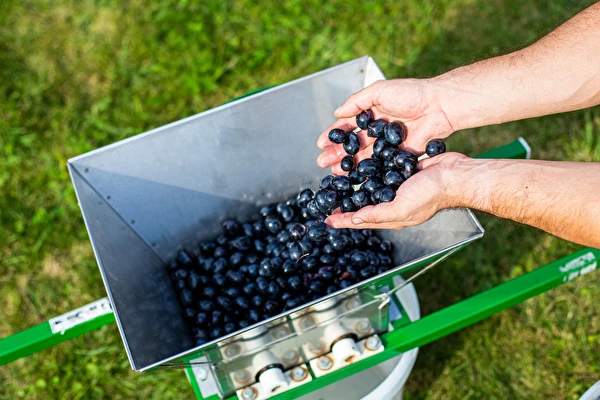
Use only healthy, ripe fruit for making wine. Wash and sort them. Remove twigs and stems. Pome fruit, e.g., apples or pears, should be crushed by cutting or using crushers. Stone fruit should first be pitted. Berry fruit, e.g., strawberries, blackberries, currants — lightly crush. Add the enzymatic preparation Pektoenzym to the pulp. It helps release juice from the fruit flesh. Leave the mixture covered for several hours. To separate the released juice, use a non-metallic sieve lined with gauze or convenient wine presses. Some musts are first fermented on the fruit pulp and only later separated from the liquid.
Preparing the must for fermentation
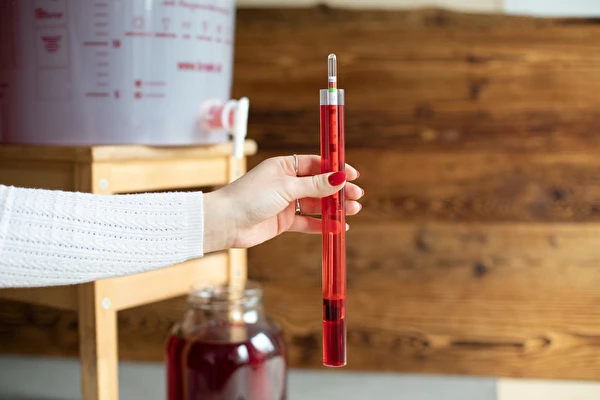
For proper fermentation, the fruit must should be “seasoned” by adding water, sugar syrup, and possibly adjusting acidity. You can find the correct proportions in recipes; you can also use simple tools and take your own measurements. For this you need simple winemaking meters — a hydrometer and an acid meter. With the first you can measure the sugar content in the must and in the finished wine (the starting sugar concentration in the must should not exceed 20–22° Blg). The second lets you measure total acidity (the recommended range for proper fermentation is 5–10 g/L) and plan to dilute the must with water, add an acidity-reducing substance — Redukwas — or a blend that increases acidity — Kwasomix. Only a properly prepared must should be fermented, by adding the appropriate yeast and nutrient.
Which wine yeast to choose?
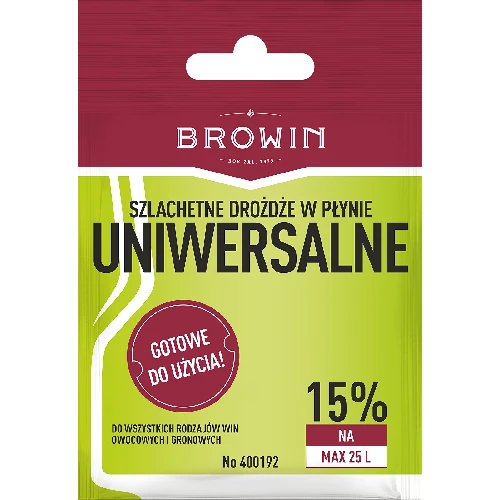
As we know, the agents that turn fruit into wine are wine yeasts. We choose them depending on the type and color of the raw material, as well as the style and strength of the wine we are planning. You can choose between cultured liquid and dried wine yeasts. The former traditionally require preparing a yeast starter (prep time about 2 days), but there are also liquid yeasts that need no propagation — liquid yeasts without propagation. Dried yeasts, on the other hand, are mixed with water and are ready to use after just 20 minutes. A novelty on the market are acidity-reducing wine yeasts Enovini RK30, dedicated to wines from acidic fruit, enabling the preparation of balanced dry and semi-dry wines that are fuller and richer in aroma. Fans of organic products can opt for Enovini Bio wine yeasts.
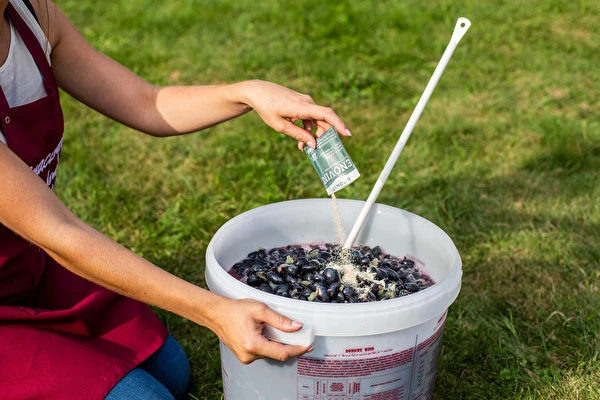
Yeast nutrients for wine
Nutrients are essential for yeast; thanks to them we achieve proper yeast propagation, a rapid start of fermentation, full attenuation, and, as a result, the right alcohol level and proper wine aroma. You can choose wine yeast and nutrient yourself, or opt for a ready, dedicated yeast-and-nutrient set — for red wines, for white and rosé or for fermentation on the pulp.
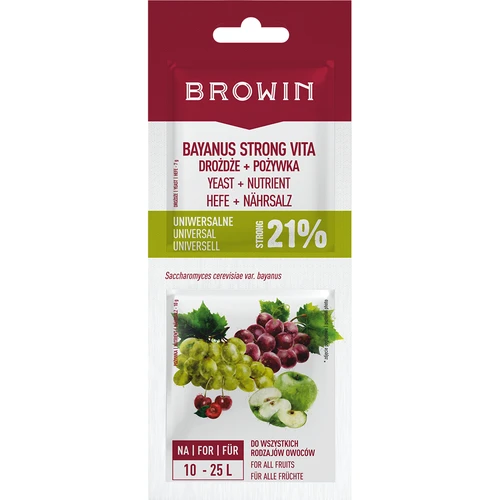
Also available on the market are ready yeast-and-nutrient sets, e.g., for strong wines up to 21% ABV Bayanus Strong Vita. For the impatient, who are short on time, there is also a yeast-and-nutrient set for rapid fermentation ViniTURBO.
Fermentation of the must
We can divide the fermentation process into three stages:
1. Initial fermentation
It lasts about 2–3 days. During this time, yeast develops rapidly. Foam appears on the surface. It’s advisable to gently move the demijohn. Stirring the contents will distribute the yeast evenly and facilitate access to oxygen and nutrients.
2. Vigorous (primary) fermentation
This lasts several days to two weeks. The amount of sugar in the must decreases while the alcohol level rises (yeast “converts” sugar into alcohol and carbon dioxide). The must foams very intensively. Its temperature rises. Attention! You should take special care (e.g., on hot summer days) not to let the must overheat. The end of vigorous fermentation is the right moment to add subsequent portions of sugar and nutrients (if you’re planning a sweeter wine and, based on the chosen recipe, assumed at the start that you would add sugar to the must in several batches).
3. Finishing (also called quiet/secondary fermentation)
The intensity of reactions decreases. Little carbon dioxide is released, the foam disappears, dead yeast collects on the bottom of the demijohn, and the liquid begins to clear.
Racking the young wine
The cessation of carbon dioxide release and the appearance of a yeast sediment on the bottom of the demijohn indicate the end of fermentation. It’s time to rack the (young) wine off the lees. Leaving the wine on the lees may cause haze, color change, and deterioration of taste. Light wines require the quickest racking, especially if fermentation was carried out at a high temperature. As a guideline, rack the wine off the lees:
- for light wines: in the 3rd–5th week,
- for medium-strong (table) wines: in the 4th–5th week,
- for strong (dessert) wines: in the 8th–14th week.
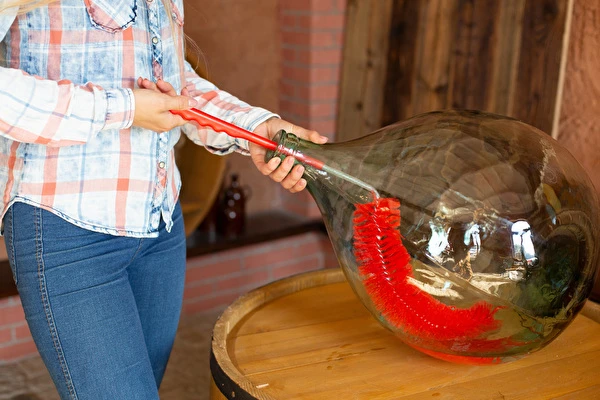
Use hoses and racking kits to rack wine. It’s best if the hose is fitted with a glass racking cane with a side opening to prevent drawing in the lees from the bottom, and with a clip for the vessel’s neck so the hose doesn’t move.
Place the demijohn with wine higher than the vessel you will rack into. Remember to maintain hygiene — young wine can be easily contaminated. This is a good time to check the taste and make any adjustments (add sugar, honey, fruit juice, Kwasomix). After racking the wine off the lees, seal it with a stopper and airlock and set it in a dark, not too warm place (about 21°C). After a few weeks, check whether the wine has become clearer and whether a new layer of dead yeast has formed on the bottom. If the lees are clearly visible, it’s worth racking the wine off the lees again. You can rack the wine multiple times until full clarity is achieved. Remember, however, that each contact of the wine with air carries a risk of contamination.
Filtering and clarifying the wine
If the wine has not cleared on its own, you need to help it achieve proper clarity and color. Sometimes it’s enough to strain the wine using a funnel (place cloth, cotton wool, or special filter papers in the funnel). You can also use professional wine filtration sets. If filtration is not effective, use fining agents. Choose the fining agent depending on the color of the wine and the type of haze. Carry out fining at the lowest possible temperature.
Aging the wine
Aging improves the wine’s taste and aroma. It should also stabilize the clarity of the drink. The wine can age in the same vessels in which it fermented. Simply top the vessel up to the brim with wine and seal tightly. Traditionally, aging in demijohns is recommended. The aging time depends on the type of wine. Light wines are ready to drink after 1–2 months, table wines should age for half a year, dessert wines for a year, or even several years.
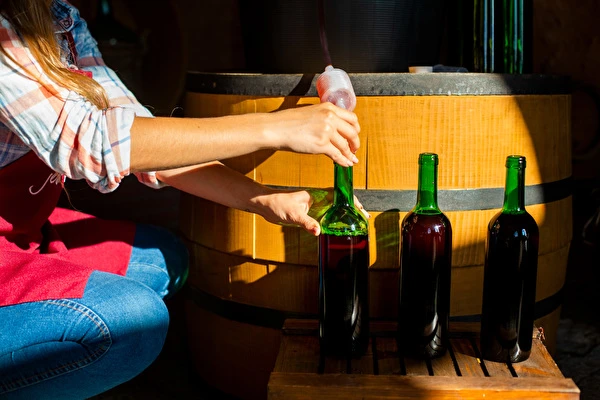
Bottling the wine
When the wine is fully clear and mature, you can bottle it into bottles. For red and rosé wines, bottles made of green or brown glass are recommended to prevent color change. Bottles intended for wine storage should be thoroughly washed. You can sanitize them with 70% alcohol or use a 2–3% solution of potassium metabisulfite. To close the bottles, use new corks (old ones may be contaminated and impregnated with foreign odors). We recommend the small, convenient corkers available for sale, thanks to which quickly sealing dozens of bottles is no problem. You can further equip the bottles with shrink capsules and labels, on which you can note the type of wine, its vintage, and strength.
Cellaring the wine
It’s best to store wine bottles on their side (so the cork is completely immersed in wine) at 10–15°C. Properly prepared wine can be cellared for several years. Check from time to time that the corks are not leaking. The cellaring time depends on the type of wine. Light wines are cellared for a shorter time, strong wines longer.
Stabilizing the wine
A fully mature wine (properly prepared and stored) generally does not require stabilization. Sometimes, however, wine becomes cloudy. This problem most often affects young wines with a low alcohol percentage. Wine can be stabilized by:
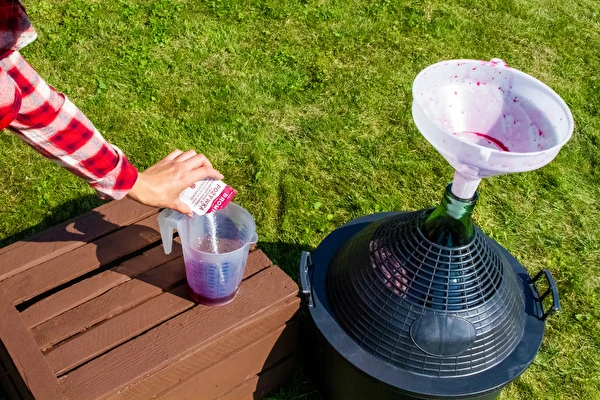
1. Sulfiting
Add potassium metabisulfite (1 g per 10 L of wine) to the demijohn, mix thoroughly, then filter the wine and bottle it.
2. Pasteurization
Heat bottles of wine to 72–74°C for about 30 minutes. Remember not to fill the bottles to the very top and to secure the corks with wire or clips (heated wine expands and may push the corks out). The bottles should be immersed in water to a level above the wine surface.
3. Increasing the alcohol content
Rectified spirit strongly preserves wine. To increase the alcohol content of the wine by 3%, add 3 × 12 ml (36 ml) of 96% spirit per liter of wine.
Possible problems with wine – how to deal with them?
It may happen that despite your best efforts the wine obtained does not meet expectations — it has the wrong color, aroma, or taste. We then speak of wine faults or diseases. The most common faults are listed below, along with ways to deal with them:
- Too low acidity — add the acid blend Kwasomix or blend the wine with another, more acidic one.
- Too low acidity — add Redukwas or blend with a less acidic wine.
- Too low alcohol strength — add Restart yeast to restart fermentation in wines with alcohol levels up to 10%.
- Browning of the wine — cellar the wine longer, then fine and filter it; you can also pasteurize the wine or try sulfiting (add 0.5–2 g of potassium metabisulfite per 10 liters of wine).
- Lack of clarity — clarify the wine with a suitable fining agent.
The faults listed above are relatively minor and easy to remove. The situation becomes more complicated when we deal with wine diseases. In such cases, seek advice from experienced practitioners or look for solutions in professional winemaking literature. However, if you maintain cleanliness and follow the other rules given in this mini guide, the likelihood of such diseases is minimal.
We hope you’ll take up the challenge and, for your next bottles of wine, head to your own cellar rather than to the store. Good luck!