
 Cheese calculator


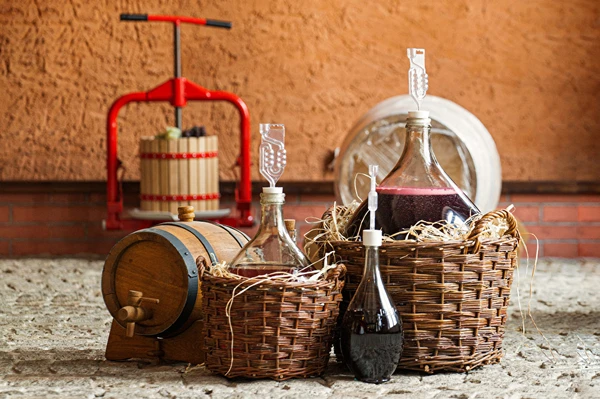
 Winemaking


The taste of homemade cold cuts clearly differs from those available in supermarkets and butcher shops. If you value choosing the right ingredients, want to avoid artificial additives and enhancers, and are looking for full flavor tailored to your preferences — choose to make cold cuts at home. It’s not difficult at all! All you need is a bit of motivation, some equipment, and high-quality meat to conjure up delicious and aromatic sausages, hams, pâtés, and stews in the comfort of your home. If you want to learn how to prepare to start your charcuterie journey, read our post, where we reveal the details and the secrets of our experts!
PREPARING HOMEMADE COLD CUTS AND MEATS FOR SMOKING CAN BE DIVIDED INTO SEVERAL STAGES:
Curing
The first stage in preparing meats for further processing is curing. It’s not 100% necessary, but this process preserves the meat, gives it a pink color, makes it tender, and extends its shelf life. The basis of a good curing brine is saltpetre and table salt. You can also use curing salt or potassium nitrate.
In the first stage of curing, nitrate ions from saltpetre are reduced to nitrites under the influence of enzymes contained in the meat. Next, these ions react with myoglobin (the protein responsible for the pink but unstable color of meat). The reaction product is nitrosomyoglobin, which has a stable pink color even at higher temperatures.
Using potassium nitrate, which contains only nitrate ions, is healthier and safer than using curing blends available on the market that contain nitrites, which, even in the case of slight overdosing, may be harmful to our health.
Note!
The optimal temperature for curing and salting is between 0.5 and 8°C. The curing and salting process should not be carried out at temperatures above 10°C, while at 0°C the process is almost completely halted.
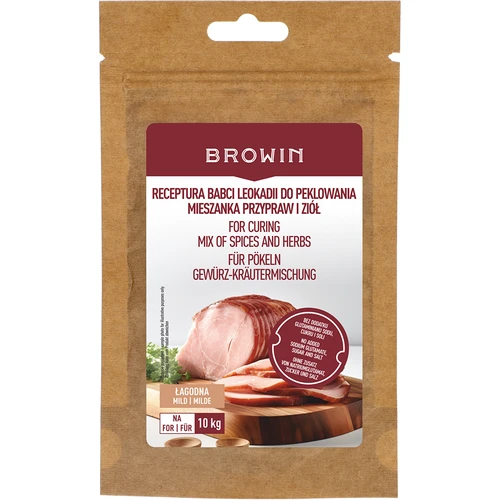
Dry curing consists in rubbing the meat with salt, saltpetre, sugar, and an aromatic spice blend (e.g., Grandma Leokadia’s herb blend).
This method can be used for any type of meat: beef, pork, mutton, as well as poultry (duck, goose). Rubbing the pieces of meat should be done very carefully; in particular, salt all grooves and places left by bones, which are very prone to colonization by microorganisms. After rubbing, drain the meat to remove excess brine and blood, then transfer it in an airtight container to a very cool place. Meat prepared this way can be stored (without fear of spoilage) for even several months.
Mixed curing:
Perfect for all portions of meat weighing no more than 4 kg; it should be used especially when the meat cannot release sufficient juices on its own.
In the first stage, meat portions are dry-cured for about 1 week.
Then we have two options for further processing:
- Collect the natural brine formed during dry curing and use it to prepare the solution used for wet curing.
- Do not use the natural brine, but prepare a new one. In this case, the table salt content in the brine (depending on the size of the meat) may range from 12 to 20%.
Wet curing (in brine):
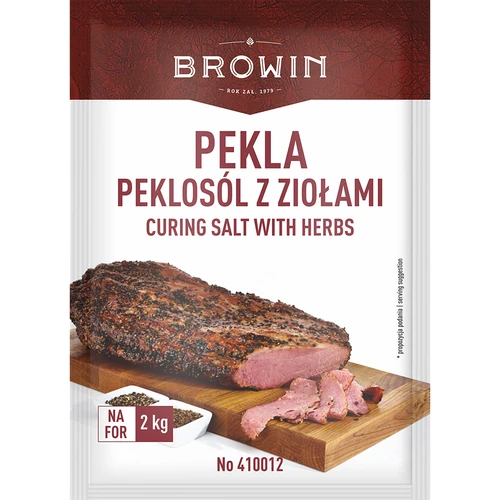
This is the most commonly used curing method, consisting of exposing the meat to a strong salt solution with the addition of saltpetre and aromatic spices.
The principle for preparing the solution is simple:
For 1 liter of water, prepare 70 g of salt, 2 g of saltpetre, 5 g of sugar, and spices of your choice (such as allspice, bay leaf, coriander, cloves, rosemary, juniper, garlic, and mustard seed) or use a ready-made blend. Remember that the meat must be completely covered by the brine, but it should not float in it. Meat for curing must be absolutely boneless — in the presence of bones, meat spoils very quickly. Place the prepared curing brine with the meat in the refrigerator (temperature 2–8°C) for about 2 weeks. Also remember to turn the meat every 2 days so the curing liquid reaches all its nooks and crannies.
Heat treatment of meat
The next stage after curing is heat treatment of the meat, which aims to extend the product’s shelf life and give it the desired flavor and texture.
Depending on the desired effect, the meat can be subjected to:
- poaching alone – white sausage, poached
- smoking followed by drying – Krakowska semi-dried sausage
- smoking followed by poaching – white smoked sausage, country-style
Note!
We do not recommend poaching before smoking, as products intended for smoking should contain as little water as possible.
Poaching
This process is similar to boiling, with the only difference being that instead of 100°C, during poaching products are exposed to about 70–80°C. It is very important to place products into water that has already reached this temperature (the meat will then be juicier), rather than heating the water together with the product.
Longer poaching causes much smaller losses than short boiling, while improving the flavor value of the meat and its products. This process is most often carried out in open vessels. Poaching meat products should continue until they reach an internal temperature of about 66-69 °C, for poultry - 73 °C. Probe food thermometers will help you control the temperature. The average poaching time for various products is:
- sausages – about 20 minutes per 1 kg,
- hams etc. – about 1 hour per 1 kg of meat in a single piece.
This process can be used for meat products placed in any type of casing:
- natural pork, beef, or sheep casings, etc.,
- collagen casings,
- protein casings,
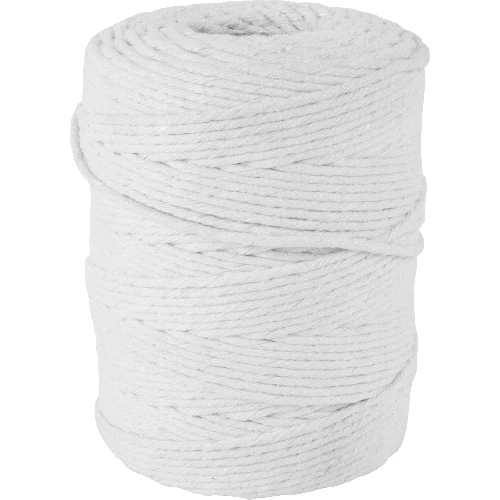
- meat nets and butcher’s twine,
Note!
For visual and aesthetic reasons, poaching products in protein casings is least recommended; we recommend these primarily for the smoking process.
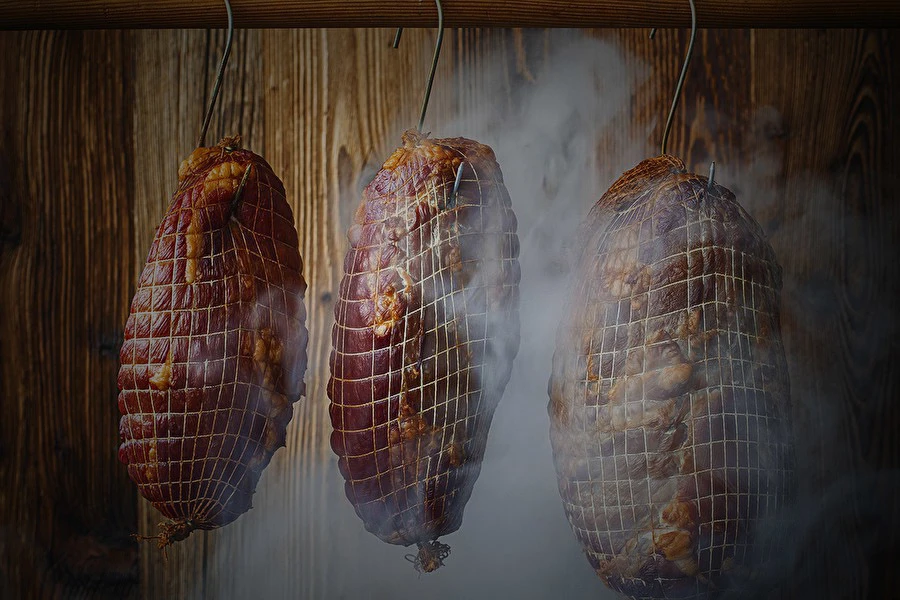
Smoking
This is a traditional method with a preserving and flavoring effect, while also coloring the products. In addition, this method draws out water. Smoke can be generated both inside and outside the smoking chamber. To obtain a tasty and wholesome product, the smoke must meet specific criteria. The final composition of the smoke depends on the types of wood used and the combustion temperature. Therefore, it is best to buy proven and properly cleaned smoker wood chips. Currently, the most popular chips come from natural woods such as beech, alder, cherry, or apple. The combination of smoke, meat, and spices creates the characteristic smoking aroma.
Depending on the temperature, we distinguish the following smoking methods:
Cold smoking
It takes place at a temperature from 8 to 25°C and causes the strongest drying of smoked meats; it also requires a long time. It should be carried out with breaks, in several phases. The first phase of smoking usually lasts 5–12 hours. Between phases there is ventilation (about 5 hours) to introduce fresh air. This additionally dries the smoked meats and helps develop the right aroma. Depending on the product, the entire cold-smoking process consists of 3–5 such phases.
This method is used for smoking raw sausages and raw products after curing (mainly dry curing). Products prepared this way are durable, tasty, and can be stored for a very long time. Remember to store them in a cool, dark, and well-ventilated place. Products should not touch each other; they should also be protected from dust and light.
Warm smoking
This method is used primarily for poached and cooked products. It is smoking at a temperature from 24 to 60°C. It is carried out without breaks for up to about 24 hours, so the temperature in the smoking chamber must be maintained by an additional heat source. The combustion of wood material alone is not sufficient to maintain the proper thermal conditions.
Hot smoking
In this method, the temperature used is from 40 to 90°C. Depending on the product and heating temperature, smoking lasts from a few hours to 2 days. This smoking method is used mainly for sausages and smoked meats intended for quick consumption, which after heat treatment can be dried, poached, or roasted.
Roasting
This method is used when you want to prepare whole poultry or larger pieces of meat. Roasting preserves the characteristic aroma of the meat, while a delicate golden crust forms on the surface. However, it does not prevent juices from escaping. It’s best to roast the meat relatively briefly in a very hot oven; it will stay juicy. During roasting it’s sometimes hard to tell whether the dish is ready. Special thermometers with a probe on a skewer are used to measure the internal temperature of the meat.
Boiling
This method can be used for all types of meat, which are best boiled in large pieces after pouring boiling water over them. This causes the surface to set, which prevents drying and the loss of minerals and vitamins. However, prolonged boiling still leaches valuable salts, flavor compounds, and collagen. Products after such processing are the least valuable.
Enjoy! ...because homemade is better!